
There’s much flaw of forming parts were happened during softening and injection molding period, yet sometimes it also relates to faulty tool design, the possible factors include: cavities quantity, cold/hot runner system, type, location & size of gate, as well as part structure, etc. Therefore, in order to avoid the part flaw from mold design, design and process parameter analysis is needed when we are going to make the mold.
Improper mold design usually caused one kind or another flaw to final part, therefore, before modifying the mold, mold trial and testing need to be implemented to optimize mold design and process parameters, thus the unnecessary defect can be avoided, and fulfill the high quality requirement of large volume production at the mean time.
The purpose of mold trial is not only to obtain a good sample, more importantly to find out the optimized process parameter and mold design. Thus, even if the material, machine setup or surrounded condition changed, steady and continuous production condition can still be guaranteed. This is critical.
General procedure of mold trial:
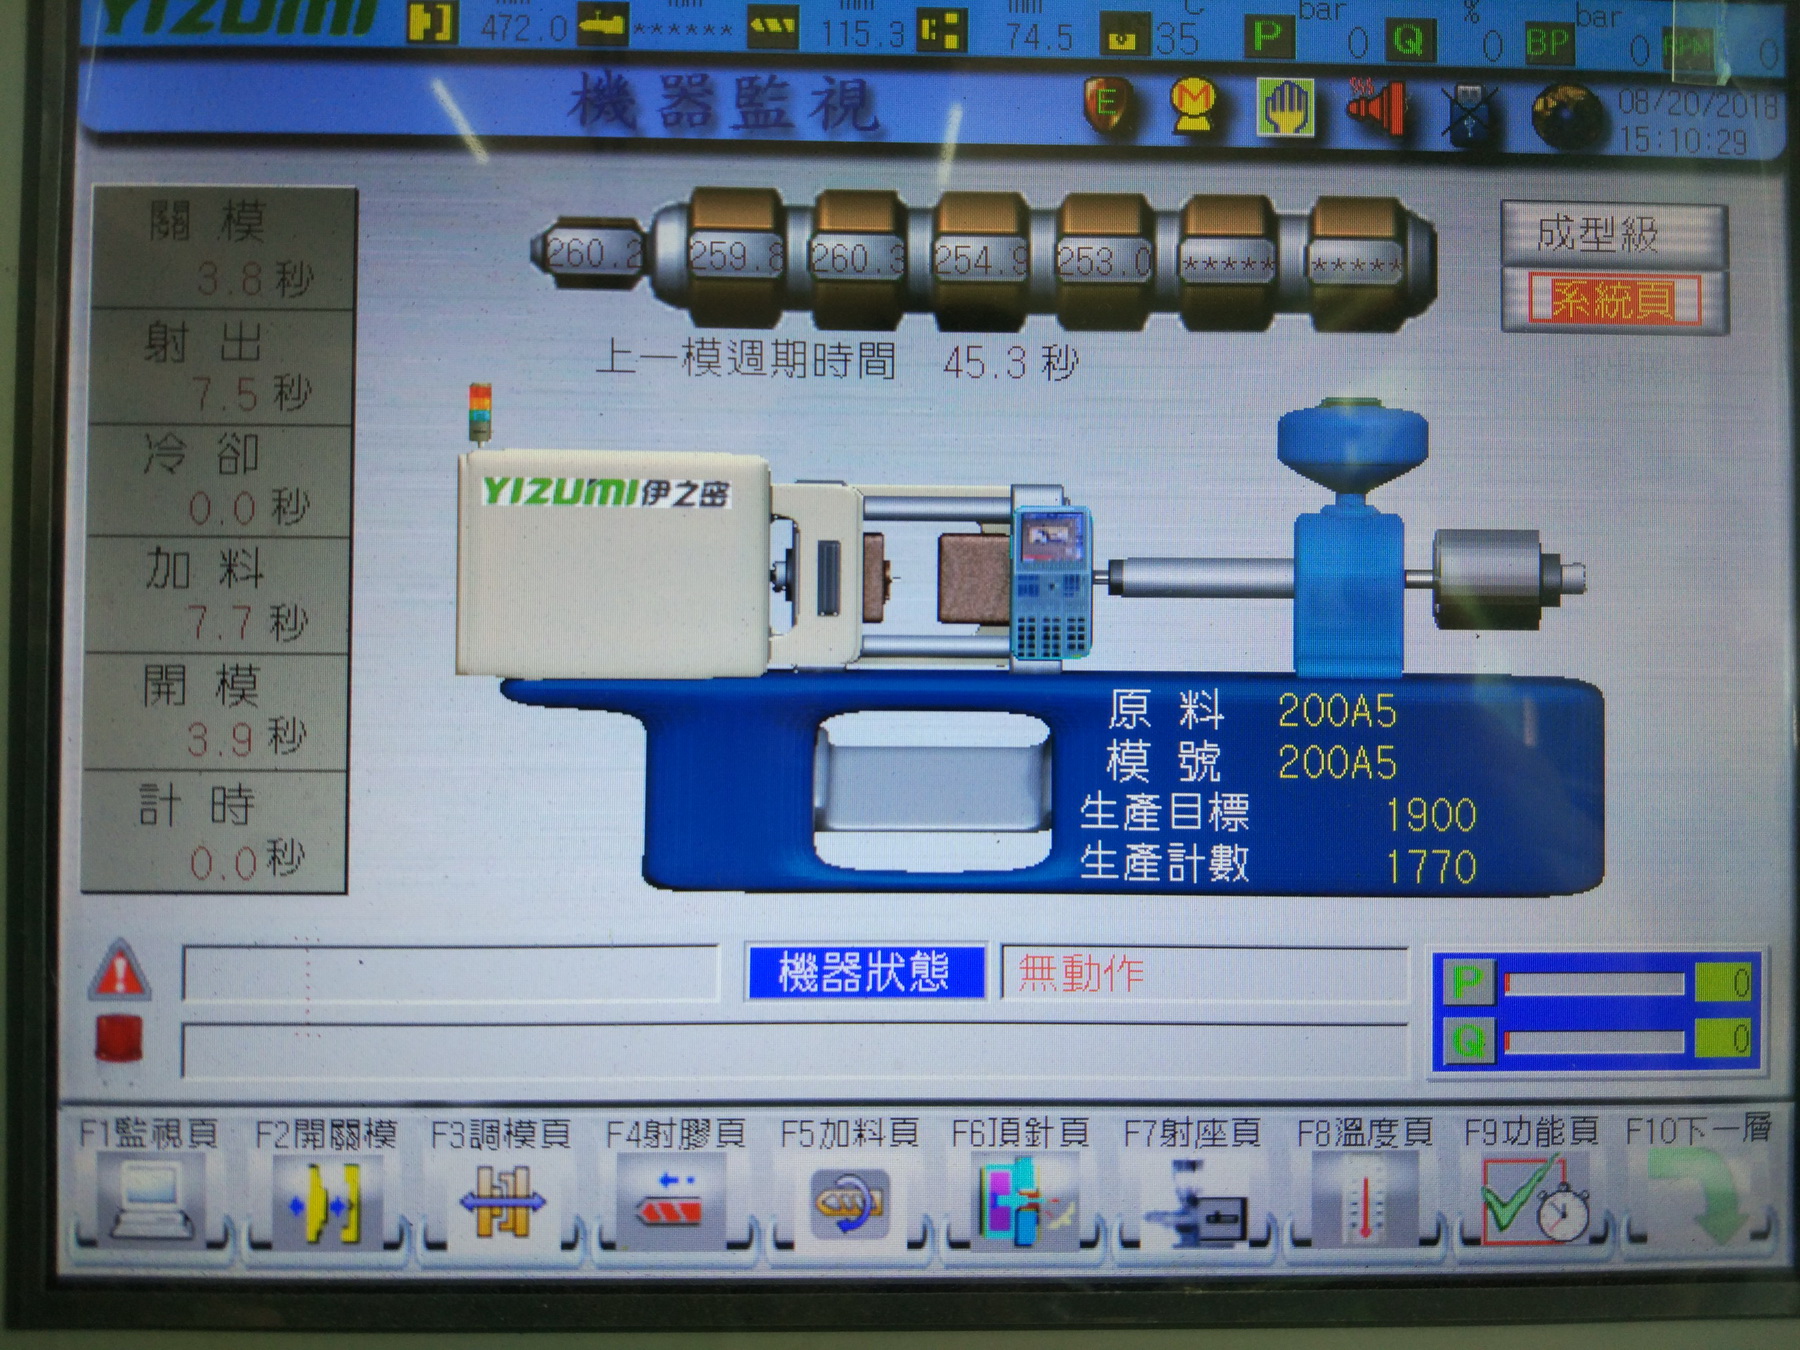
Step 1. Setup the temperature of material barrel
Please note that, the setup of initial temperature of material barrel must be according to material supplier’s recommend. That’s because there’s significant difference between different factories and different grades, when material supplier is usually very familiar with their own material. So the users should do the essential setup as per their recommend, then do some small adjustment according to the actual production condition.
Besides, checking the actual temperature of melt material with detector is also necessary. That’s because the temperature we set can’t always guarantee to be matched to the melt material on account of work condition, type of temperature sensor and depth of position, etc. Sometimes the actual temperature of melt material is far away to the setup parameter because of some oil or other factors.
Step 2. Setup the mold temperature
Similarly, the initial mold temperature also needs to match the recommended value from material supplier. Please note that, the mold temperature we are saying is the temperature of cavity surface, not the one showed on the mold temp controller. Most of time, temp showed on the mold temp controller is different from the temp of cavity surface because of working condition and the improper power of mold temp controller, and so on. So the temp of cavity surface must be inspected and recorded before mold trial. What’s more, we need to inspect every position of mold cavity, to see if their temperature is even or not, and record the result, which can be reference for the future mold optimization.
Step 3. Based on experience, set-up the plasticizing volume, limited value of injection pressure, injection rate, cooling time and rotation speed of screw, etc. and optimize them properly.
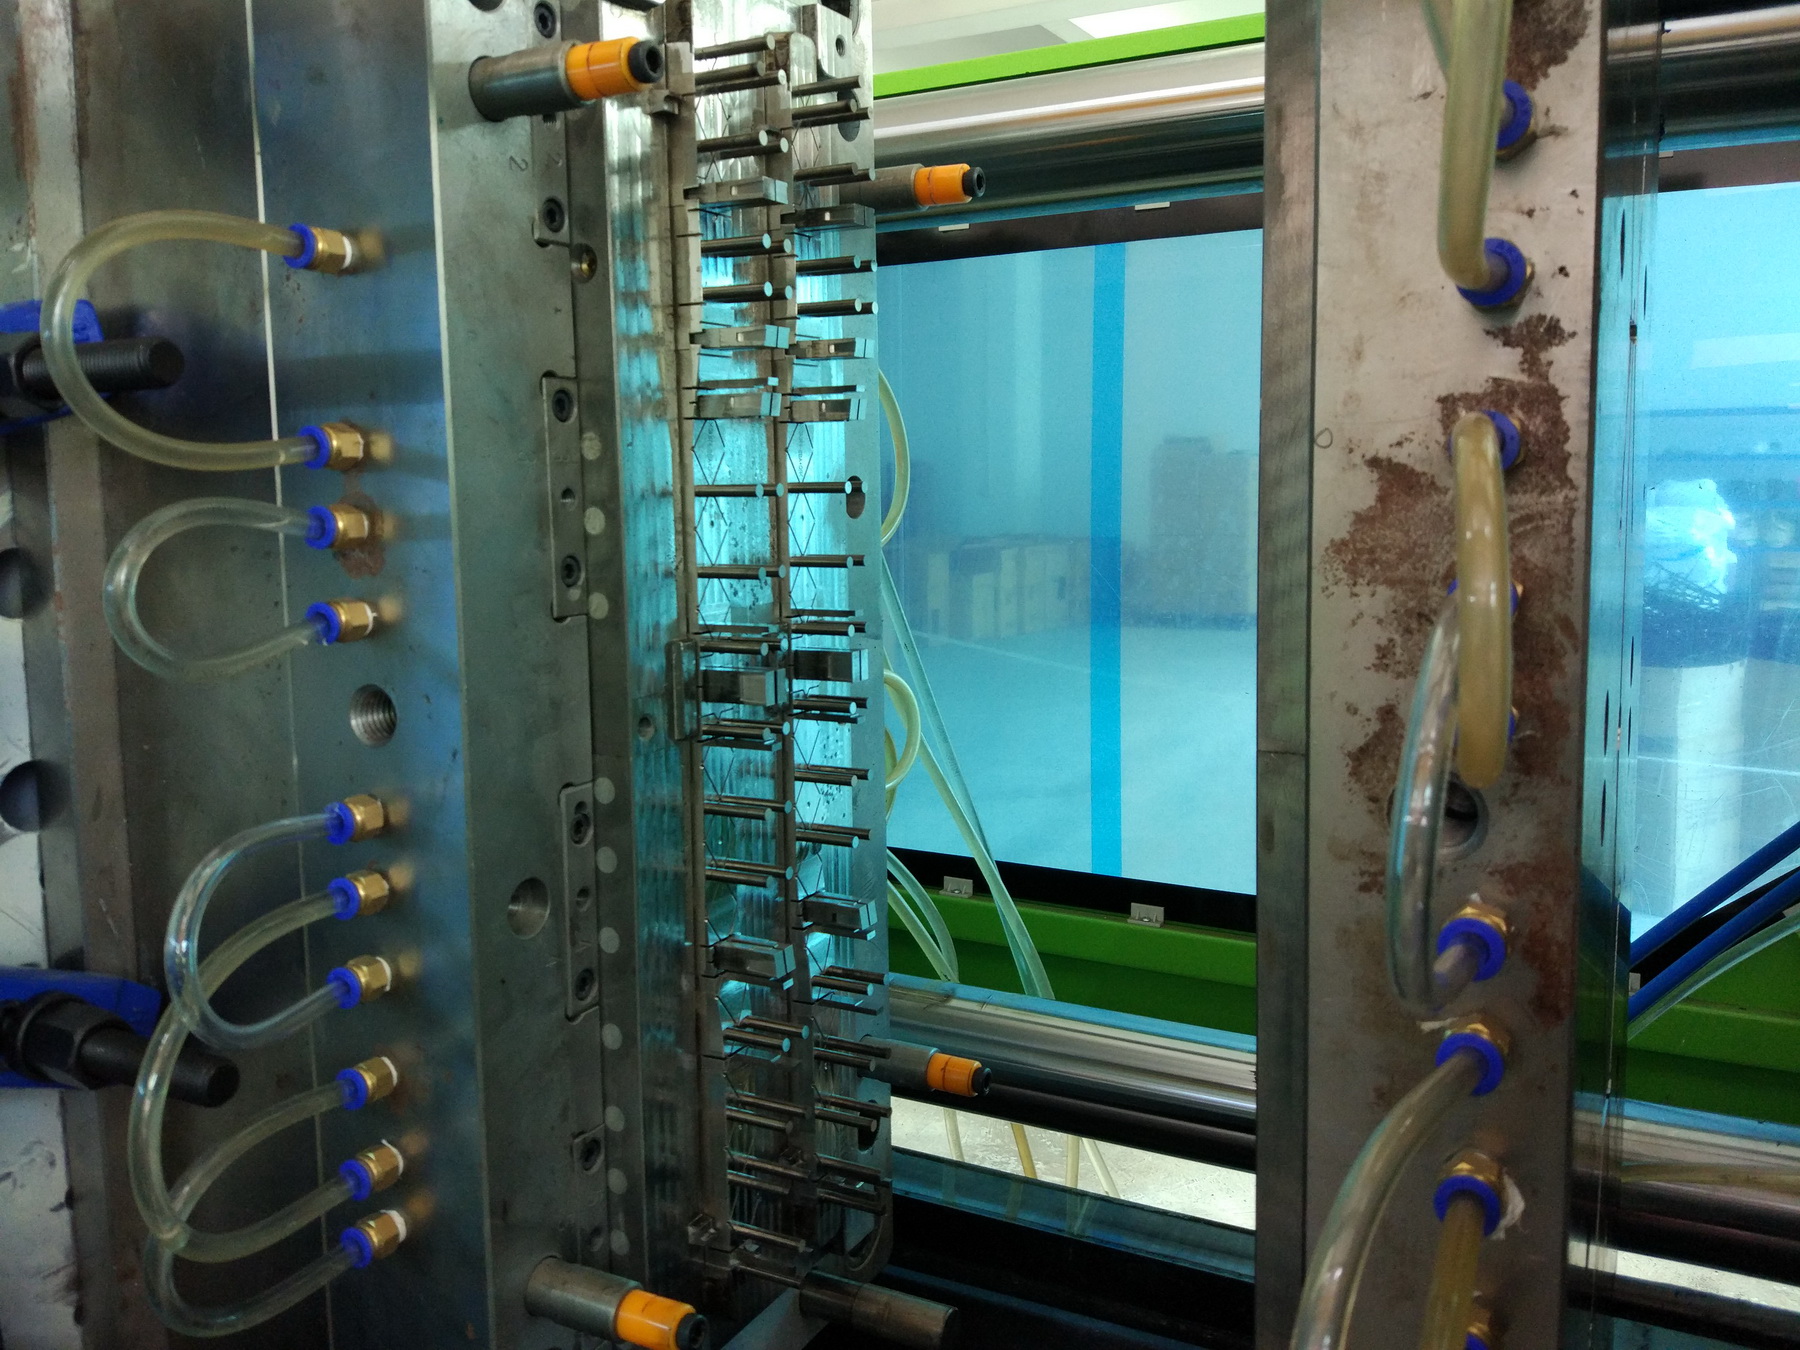
Step 4. Filling experiment, find out the change point, which is the change value from injection period to holdup period, it can be screw location, filling time and filling pressure. It is one of the most important and fundamental parameters. In the actual filling experiment, you need to follow some rules as below:
1) Holdup pressure and holdup time usually be zero during experiment.
2) Normally the part should be filled to the end, of course it depends on the wall thickness and the mold structure design.
3) Since the injection speed will affect the location of pressure changed point, thus we need to re-confirm the pressure changed point every time when we change the injection speed.
With the filling experiment, users can watch the flowing path of the material in the cavity, so as to find out where is easy to have air entrapment in the mold, or which location need to be improved for de-gas.
Step 5. Find out the limited value of injection pressure. During this procedure, injection pressure and injection speed should be concerned. Pressure and speed is related each other in the hydraulic system. Therefore, the two parameter can’t be set at the same time to fulfill the required condition.
Step 6. Find out the optimized injection speed. The injection speed here means, to make the filling time as short as possible, and filling pressure with injection speed as small as possible
During this procedure, some noted need to be paid attention:
- Most of surface flaw, especially those one nearby the gate, are caused by the injection speed.
- Multistage injection is used only when one-time injection can’t fulfill the process requirement, especially the mold trial stage.
- When mold perfectly, changing point set correctly, and the injection speed is enough, there’s no relationship between the injection speed and the flash.
Step 7. Optimize the holdup time, which is also called the solidified time of the gate. Usually we can confirm the solidified time by weighting, then obtain the different holdup time.
Step 8. Optimize other parameter such as holdup pressure and clamping force.
In the end, something needs to emphasize is, the purpose and point of mold trail is to optimize the mold and process, to fulfill the high-volume production, but not just for getting good samples.